Skoolie Solar Panel Installation
Ever since the beginning of our skoolie build design, we knew we wanted solar. Solar would give us the possibility to not be tied to a cord all the time when traveling. Other than that we only had a basic understanding of how it worked. Due to how quickly we wanted to travel and our inexperience with it, we originally planned to have solar installed by the builder. As the build was delayed we eventually decided to install the solar system by ourselves. q In the back of my mind I kind of dreaded it because of all of the variables and personal opinions that are involved with setting up a solar system. When we picked up the bus in April, I had plenty to keep me busy for a while until getting to solar. In early June while attending our first Tiny Home Show, we suddenly understood firsthand how valuable it could be. While at the show we were suppose to have a generator hook-up provided, but their generator system was not meant for RV style set ups. At the end of the first day we had to run our bus just to charge our batteries. On the second day, our inverter low voltage alarm went off and we had to shut the power down for the entire bus about halfway into the day. During our daily/weekly priority meetings we instantly moved solar to the top of the list. On our way home from the show, we stopped by Solar Solutions of Missouri to finalize the solar panel layout. Solar Solutions is based out of Ozark, MO and and their specialty is residential and commercial solar installs. Even though they are based in Missouri, they do installs all over the United States. They were very eager to help us with our solar system, because they needed someone to test out product for a mobile solution. Step one was to get detailed measurements of the roof. We determined that we could fit three of the 325watt panels on the roof. Step one of getting the panels solved. That was the easy part. The fun was just starting.
THE ROOF RACK
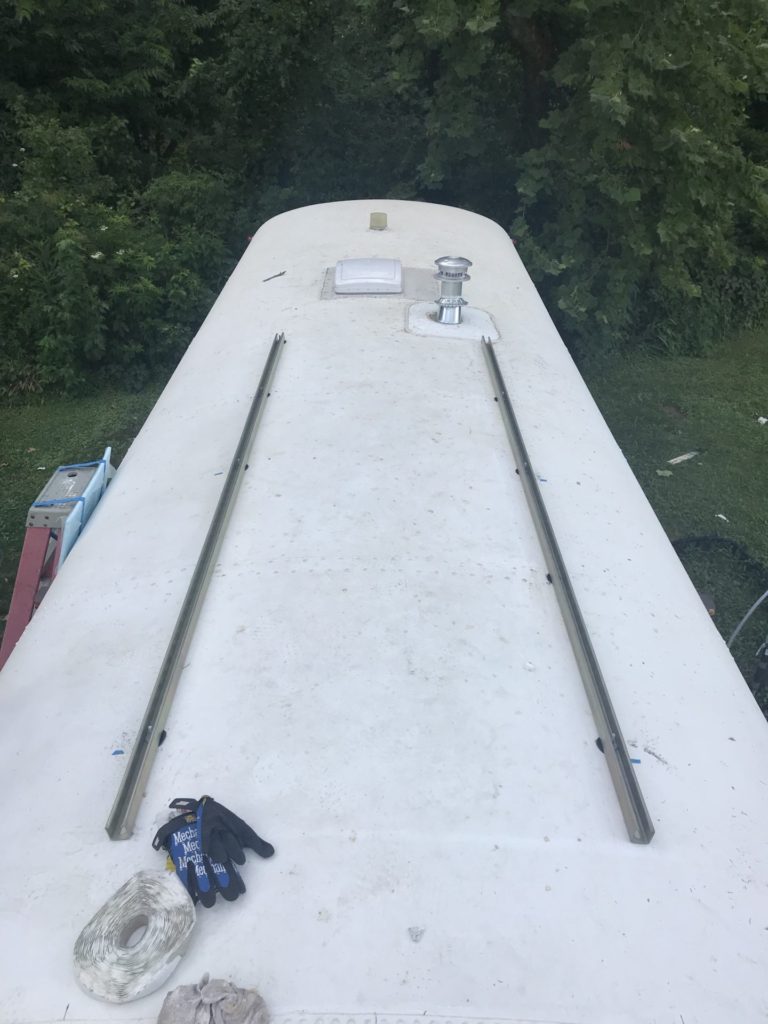
While working on other projects for the bus build, I would routinely look at solar roof racks or how to mount panels to the roof of the bus. The way we attached the panels to the roof was going to be the most important aspect of the install. I think most people have heard horror stories of solar panels flying off while driving and I did not want to experience that. I researched on the web and spoke with others that have installed solar previously and finally decided to use Unistrut for the rack system. I discussed this in depth with my dad and we came up with a plan. We first installed two 10 foot pieces of 1 ⅝” Unistrut running lengthwise with the bus. These two pieces are the core of the rack system and the most important. They are the main connection to the bus structure. In order to have the most holding strength, we have four galvanized carriage bolts on each piece of Unistrut. The carriage bolts go through the entire roof and interior ceiling structure. This is key for maximum strength. The only thing visible inside the bus on the ceiling are the bolt heads which can painted. We had to do it this way since the bus ceiling is finished. The easier way would be to install it during the build process when the ceiling is bare before installing insulation. To help absorb the shock from driving we used a ⅛” x 2” rubber washer in between the exterior roof skin and the Unistrut. This helps absorb the vibrations from driving. After the Unistrut was bolted to the roof, I used Henry’s Elastomeric roof sealant over/around the bolt locations and butyl tape under the washers.
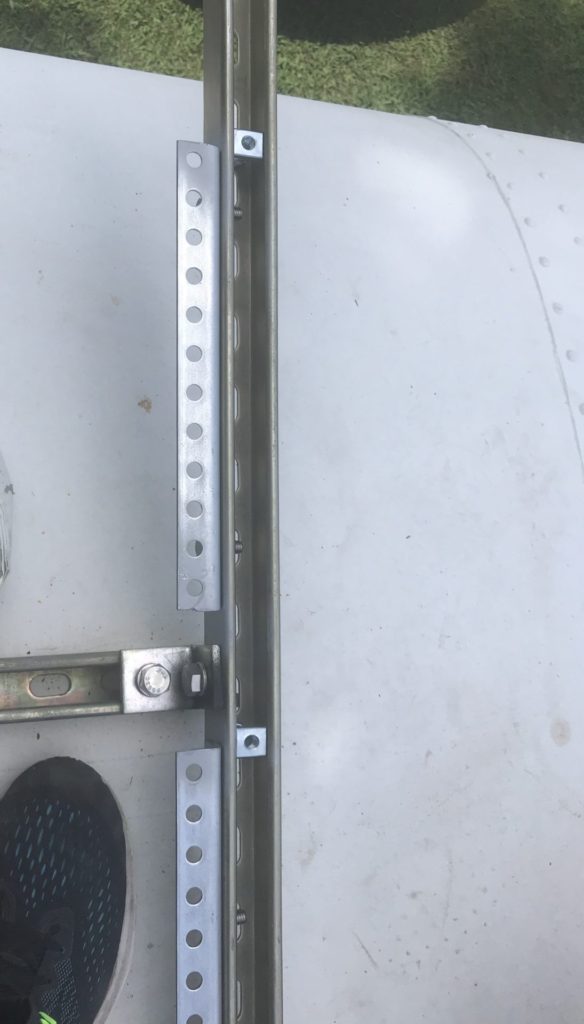
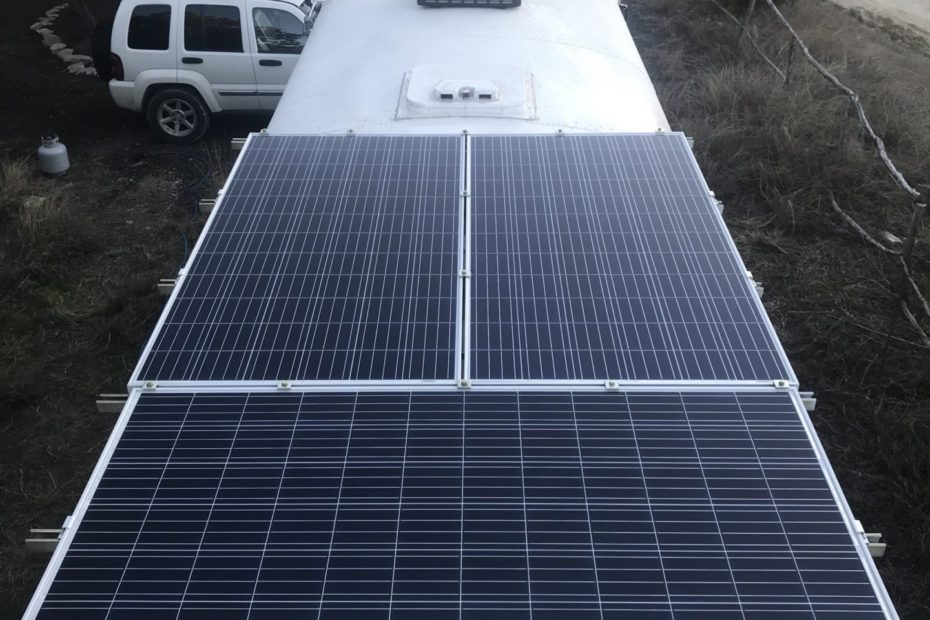
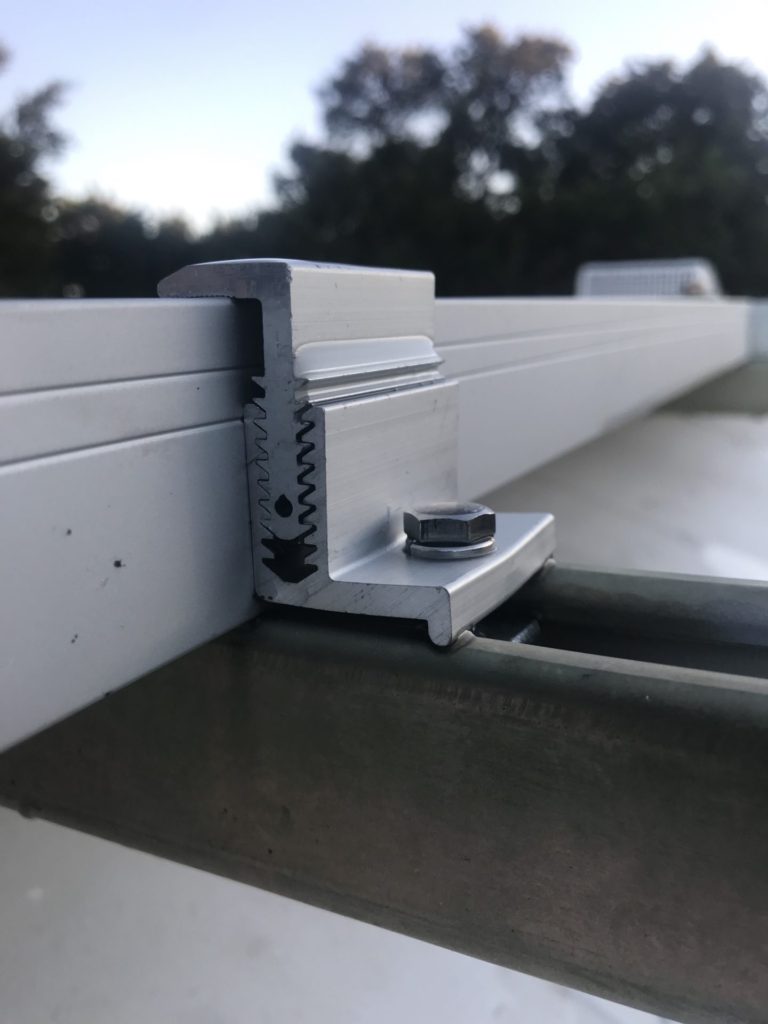
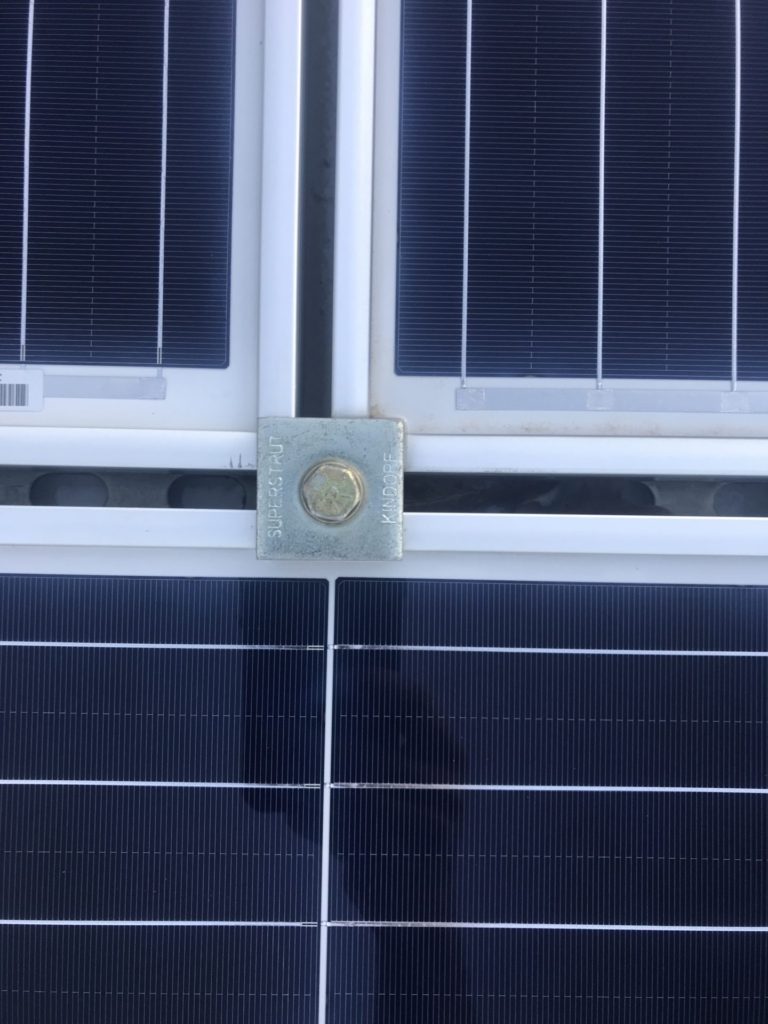
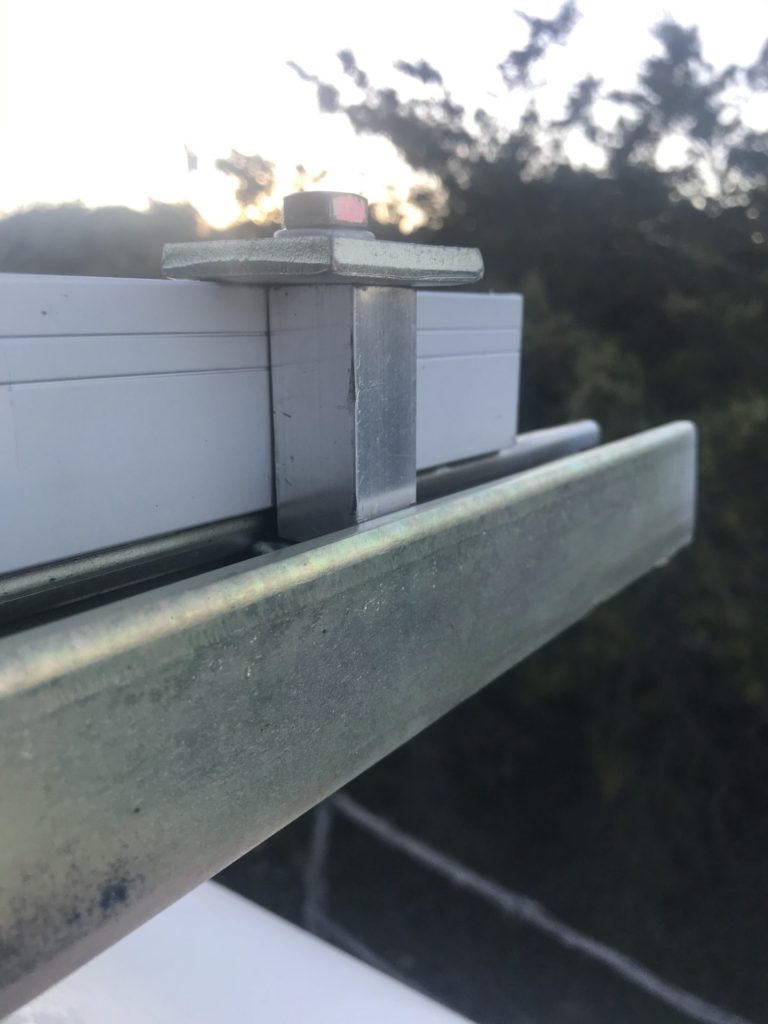
The next part of the install was installing cross beams on top of the newly installed vertical beams. The cross beams are made of the same Unistrut. We cut them to seven foot lengths and attached them with Unistrut 90 degree brackets and ½” stainless steel bolts and lock washers with ½” Spring Nuts. A key to mounting the cross beams is ensuring they are square. We measured and remeasured numerous times to make sure each piece was square. When designing the layout we were not sure what type(s) of solar panel mounts we could use and need. We knew about panel end clamps and ordered some adjustable ones( UI-AI Adjustable Solar End Clamp) off of Amazon which worked out great but they would only work on the ends. We ended up using ⅜”x3” grade 8 bolts and Unistrut square washers as way of securing panels to the rail system. One thing we found out when using the bolts to secure the panels to the rack is that it caused the panels to barely sit on the first rail. To ensure that the panel had enough support in the critical area, we bolted slotted angle iron to the side of the rail to create extra support. This solution worked perfectly. Another issue we ran into was simply using a bolt and square washer did not work on the perimeter. When tightening the bolt down it would cause the washer to slip off partially. This would be a weak link if left. While up on the roof we brain stormed ideas of we could use. We knew we needed something to support the bolt and washer and still allow us to tighten it. I had some ¾” square aluminum stock leftover from another project. We cut that down in lengths that matched the gap between the washer and rail. These spacers work perfectly and allowed for a secure connection. Where two panels meet we used just a ⅜”x3” grade 8 bolt, lock washer, and square Unistrut washer.
BATTERIES
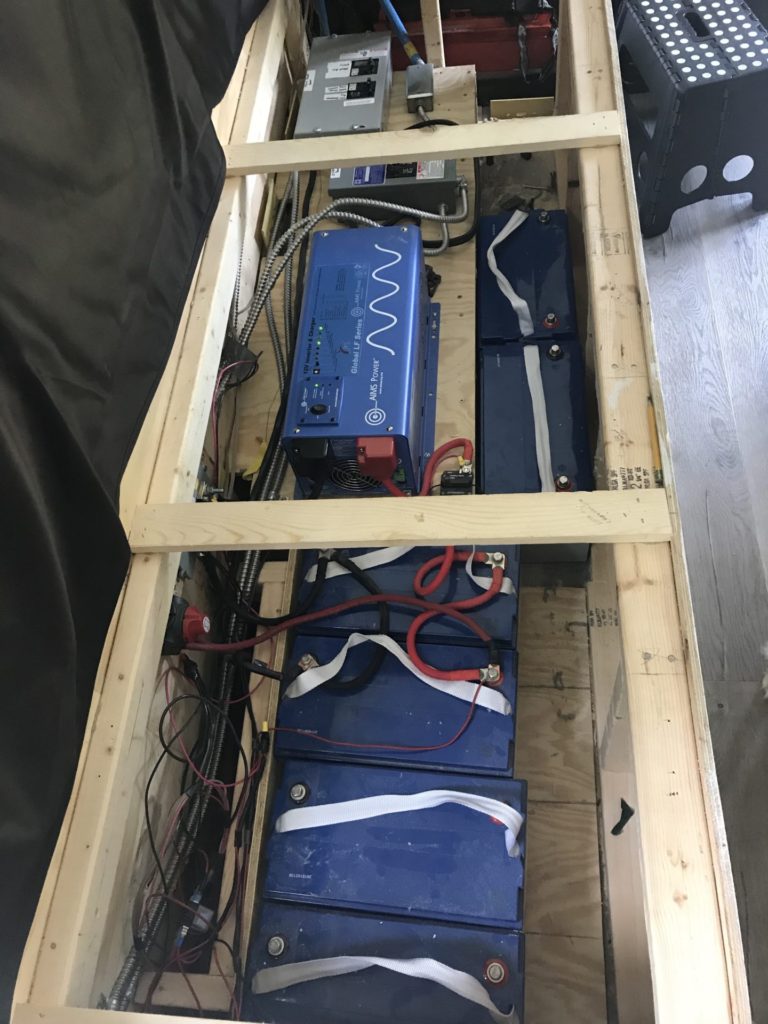
After purchasing the bus and making design layouts, we knew that we would not use conventional flooded lead acid batteries. The main reason for this is that our power center is located under the couch. We chose to go with six Renogy 12v 100ah Pure Gel Cell batteries. The six batteries are wired in parallel to create 12 volt system with 600ah of storage. They have worked perfectly so far. under our couch inside the bus. We needed a battery that is contained and does not off-gas. You could also choose AGM or Lithium batteries in this type of situation. When we picked up the bus in April we only had two house batteries at that time due to not having solar panels yet. You might ask why did we choose six batteries? Easy, we only have room for six batteries under the couch.
SOLAR CHARGE CONTROLLER
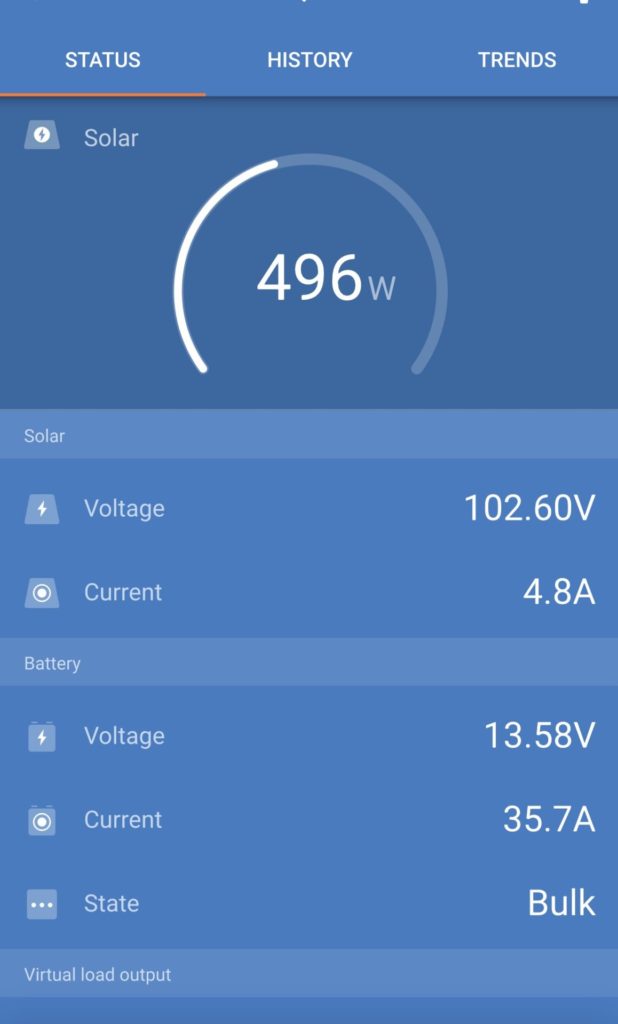
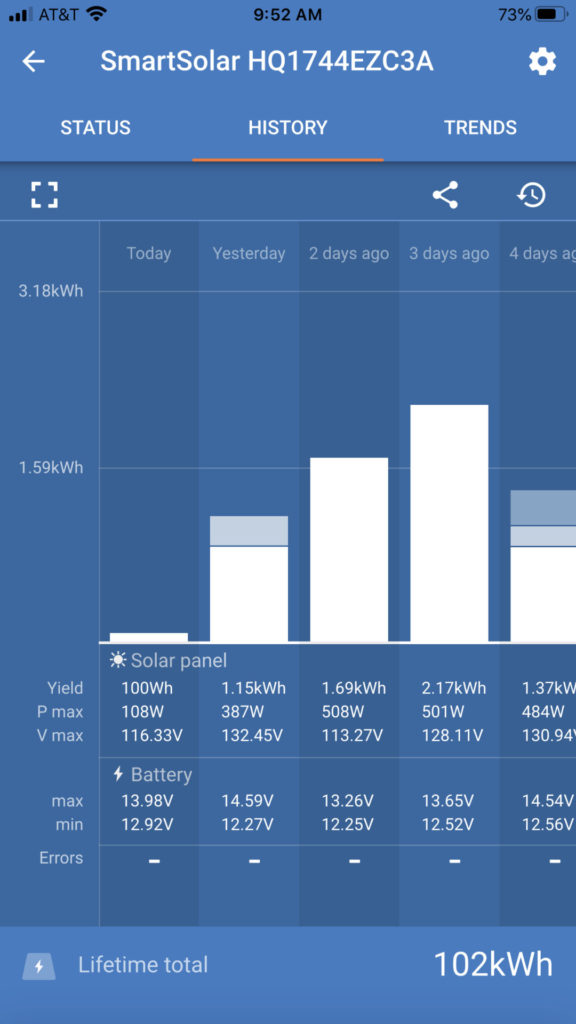
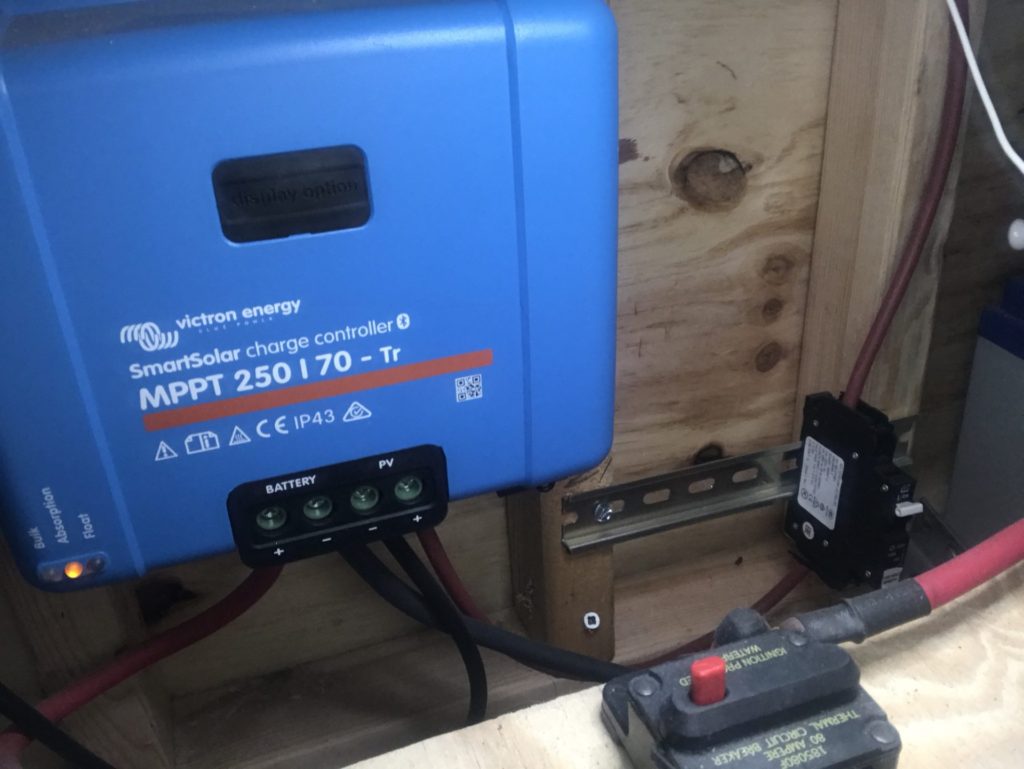
Picking out a solar charge controller can be a daunting task. I spent a lot of time researching what size and brand of charge controller I would. From my crash course in solar power, I knew that I would need a MPPT charge controller for certain. Then I started to look at brands and what they each had to offer. We ended up going with the Victron MPPT Charge Controller 250/70 . First, a typical solar install might not need a charge controller of this size. We had to use this because our panels are capable of producing 138 volts when wired in series. We chose to wire the panels in series to keep the amps lower due to having a 12 volt system. A key buying decision for the Victron SmartSolar MPPT 250/70 charge controller is the data it gives you. I am a data person. I like numbers, trends, etc to see how something is actually working. What is even better is that this charge controller is bluetooth capable and you can use an app to see up to 30 days of data including real time. I look at the app multiple times a day to see what our solar production is so far for the day. It’s a good feeling to actually see that your hard work and investment is paying off. The only thing that I still need to add to our charge controller is a Victron Smart Battery Sense Voltage/Temp Sensor. and a Victron BMV-712 Battery Monitor. Our current battery monitor is a very basic monitor. The nice part about using the Victron products with Bluetooth capability is that they all communicate with each. They also have a great app that provides a ton of The charge controller can adjust the voltage level going to the battery based on the battery temperature. If the batteries are hot, the charge controller with lower the voltage going to the battery.
WIRING
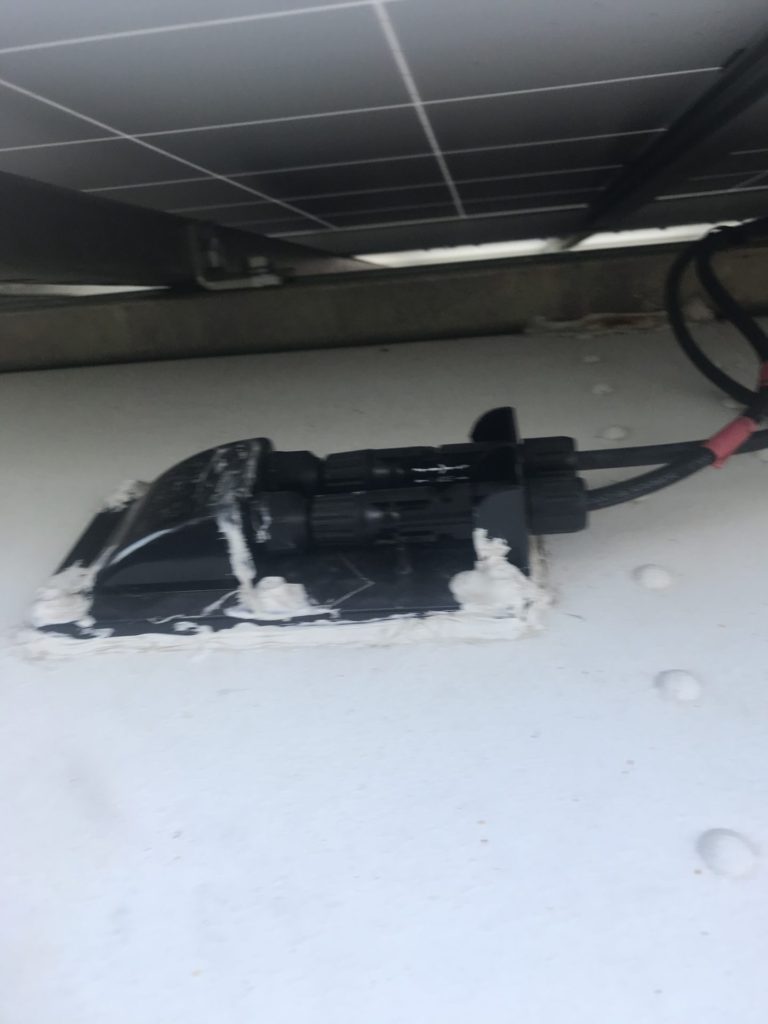
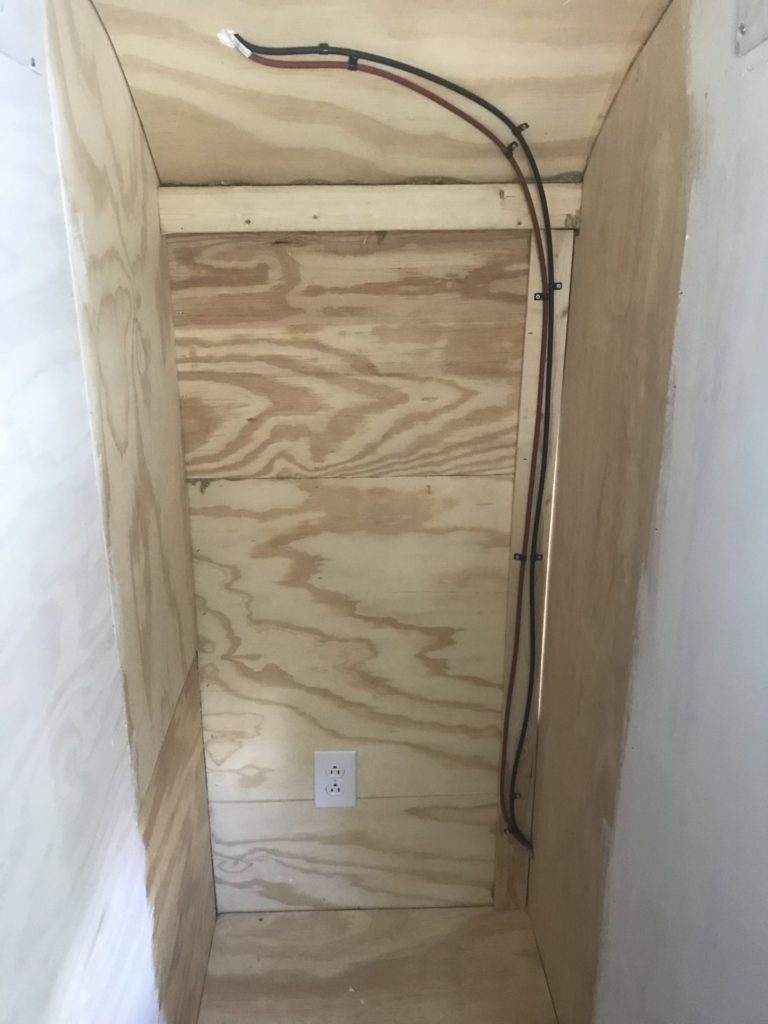
When researching the solar project, I realized that I would need to rewire some of the 12 volt wiring in the main hub under our couch. During my research I found out the gauge of wire and circuit breakers used were too small. After some digging on the web I found some great examples of basic 12 volt wiring and solar. I used these as a roadmap for how I wanted our system to look like. So I shut off the battery power to our bus and started to dismantle the existing wiring. I made sure to take pictures of everything beforehand. It did take longer to reassemble because i purchased pre-assembled battery cables at set lengths. I had to readjust my layout a couple of times to make things fit. Later that night after making my last connection, I turned the system on and everything worked the first time. It was such a great feeling for that to happen. I did use a Go Power Roof Entry Gland that was pre-wired with 25ft of cable to wire directly to the solar charge controller. This made the process go a little faster and I was impressed with it. Below are pictures of it mounted on the roof and where came in through the roof behind the refrigerator.
TEST DRIVE
An important aspect of this build is knowing how well will the solar panels travel in a moving, vibrating vehicle that is driving at highway speeds. We decided that we needed to take a short test drive to know how well the rack system will hold the panels. We woke up early one morning and took Judy on a 40 minute test drive on the interstate reaching prolonged speeds of 60-65 mph. Within a few miles I pulled off an exit ramp and wanted to check the rack to see how it was holding. I had to tighten a few of the bolts a quarter turn. After that we hit the road again and i stopped halfway through to double check them again. Everything stayed tight with no issues. The test drive was a success and our rack system supports our panels perfectly.
FIRST FULL WEEK OF SOLAR
Once we hit the road towards Colorado we stopped the first couple of nights at places that offered full hook-ups so we could run the air conditioner because it was so hot. After those first two stops we stayed at places for a week without hookups. Our solar would charge the batteries and power our key concern from the beginning, our refrigerator. Everyday I look at the app repeatedly to see how our panels are producing and getting acquainted to what each little thing means. I know Tina by now is tired of me saying repeatedly throughout the day what our solar is currently producing our how much our total yield is for the day. The one little factor I have seen is that my amps on certain days are lower which means my batteries take longer to charge. I will start looking into that piece of the puzzle next. I am going to install the Victron Smart Battery Sense Voltage/Temp Sensor and a Victon BMV-712 Battery Monitor to help better understand how my system is performing.
CONCLUSION
I hope this post helps guide someone in their path to building a solar system for the bus. It can be a very intimidating project, but once you understand some of the basics, it’s not that bad. Also, as a disclaimer I am by no means and expert in solar or 12v wiring. This is meant to show you how we did it. Please make sure that you do your own due diligence when building a system.
Parts List
Victron MPPT Charge Controller 250/70
Victron Smart Battery Sense Voltage/Temp Sensor
Victon BMV-712 Battery Monitor
6- Renogy 12v 100ah Pure Gel Cell batteries
Go Power Roof Entry with Cable(25ft)Part( GP-CEP-25) -bought from etrailer
MidNite Solar 15amp DC Breaker
DIN Rail (for DC Breaker)
Positive & Negative Terminal Bus Bar
UI-AI Adjustable Solar End Clamp
Blue Sea Systems Mega Fuse Holder
4/0 Positive Battery Cable-12″
4/0 Negative Battery Cable-12″
4/0 Positive Battery Cable-24″
4/0 Positive Battery Cable-36″
4/0 Negative Battery Cable-36″
2/0 Positive and Negative Battery Cables-12″
2/0 Positive and Negative Battery Cables-18″
#4 battery cables(charge controller and 12v fuse block)
Blue Sea Systems 12 position fuse block with negative
Bussman 100 amp circuit breaker
Blue Sea Systems Mini On/Off Switch
Hardware Store List-Solar Panel Rack
8- Superstrut/Unistrut 1 ⅝” x 10ft
1- ¾”x 4ft Aluminum Square Stock
¼” Spring Nut
⅜” Spring Nut
½” Spring Nut
Unistrut 90 degree brackets
⅜ x 4” Carriage Bolts Galvanized(washers, lock washers, nuts)
¼” x 1 Stainless steel bolts, lock washers, nuts
½” x1 Stainless steel bolts, lock washers, washers, nuts
⅜”x 3 grade 8 bolts, washers, lock washers, nuts
⅜” square washers
⅛”x 2” rubber washers
Henry’s Elastomeric Roof Sealant(Home Depot)
Butyl Tape
Slotted Angle Iron galvanized
